Stone Cut (Relief Printing)
In theory, relief printing is a simple process - a carved surface is inked and brought into firm contact with paper. Think letterpress, linocut, woodblock and in Canada’s north, stone cut. Here, at Cape Dorset’s Kinngait Studios, we’ve been creating and innovating in stone cut for close to sixty years.
Initial efforts were created using the same irregular blocks of soapstone quarried for Cape Dorset carvers. Once a suitable stone was identified, a single face was flattened with hatchet, files and finally, by sanding, before the image was carved in relief. There are a few brilliant examples where the shape and texture of the stone became an integral part of the image*, but for the most part, the use of local stone had more to do with PR than artistic process.

photo:Terry Ryan
Photos of printers hauling enormous hunks of rock on their backs were great for marketing and supported efforts to position Inuit printmaking as an indigenous, “timeless” art practice. But it didn’t take long for printers to realize that finished (gauged) stone was an infinitely more practical option - easier to move, easier to cut and accepting of standard paper sizes.

Pudlo Pudlat,photo: Terry Ryan (?)
During my time at Kinngait Studios, we’ve used slate stripped from old pool tables, exclusively. God’s honest truth. There are a lot of myths surrounding art-making in Cape Dorset, but this isn’t one of them. The first batch was salvaged after the closure of the local pool hall. The second came in 2014 when Paul Machnik of Studio PM discovered the mother load of all pool table slates in a warehouse in Montreal. He was there to purchase shelving and ended up securing enough slate to last Kinngait Studios for several generations! The entire lot was strapped to pallets, sent to the Montreal docks and shipped north via sea lift to Cape Dorset.
Not All Slate is Created Equal
The first step in the recycling process is to cut the slate into smaller, more manageable pieces. It’s important that these correspond to the Japanese paper sizes we use most often. Some of the slate is extremely hard, other pieces are soft and some are both. A printer selects his piece based on the demands of the particular image and his skill. Soft slate, which is easier to carve, is normally reserved for novice printers. Next, the printer determines whether the image will fit on the stone. Remember, we’re using pool table slate so there are holes along its edges where the slate attached to the frame of the table. There are also holes that once accommodated the pockets.

Pool table slate, notice the pockets:photo William Ritchie
Smooth and Level
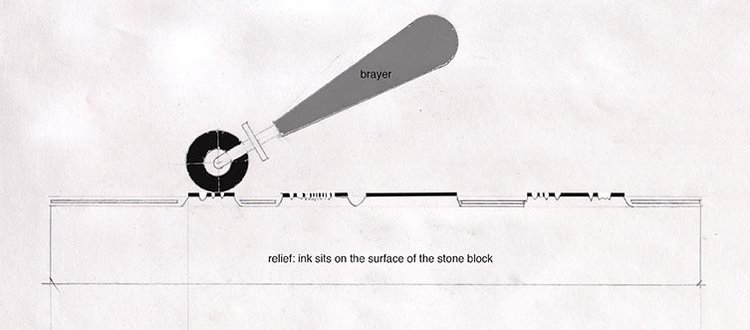
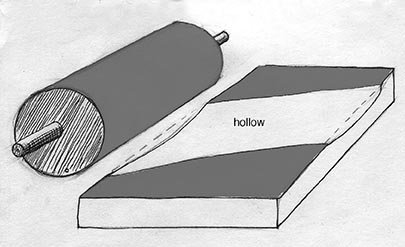
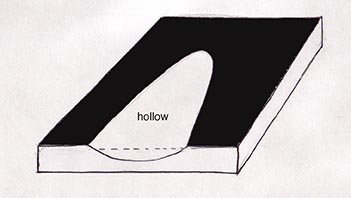
Once a suitable stone is selected, it was carried across the street to the lithography studio’s graining sink where its surface is smoothed and leveled. If the stone was previously used, the old image is removed with a chisel and files. It’s a noisy, messy process often assigned to a novice printer or a printer’s assistant. Leveling or “graining” is achieved by applying successively smaller sized grits, of carborundum, to the surface of a wet stone (imagine finishing a piece of wood using coarse to fine sandpaper). It’s crucial that the slate is level since a roller will only deposit ink on the top surface of the stone, not in any dips or valleys.
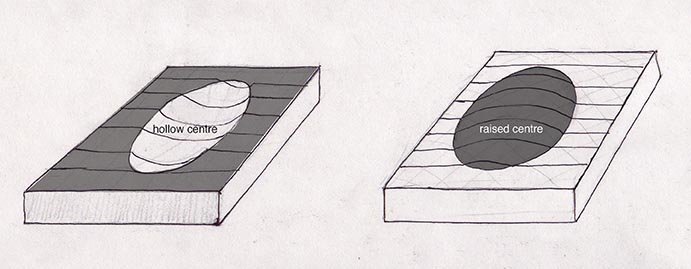
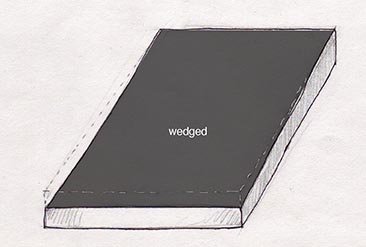
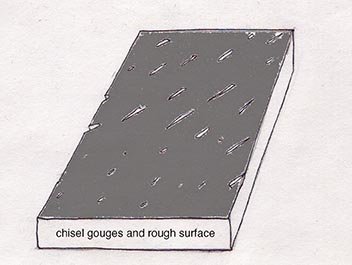
I have prepared these illustrations to show how ink sits on the surface of the stone under specific conditions. Here I'm illustrating the requirements for the use of a wide, large circumference lithographic roller. In order to be able to use such a roller on a stone cut print the stone block must be prepared in advance for this consideration. If any of these following conditions aren’t met we cannot use large format rollers to print the specific stone cut print. In almost every photo of the stone cut process you'll notice relatively small circumference/width rollers being used.

Qiatsuq Niviaqsie clears an old image off a slate block.
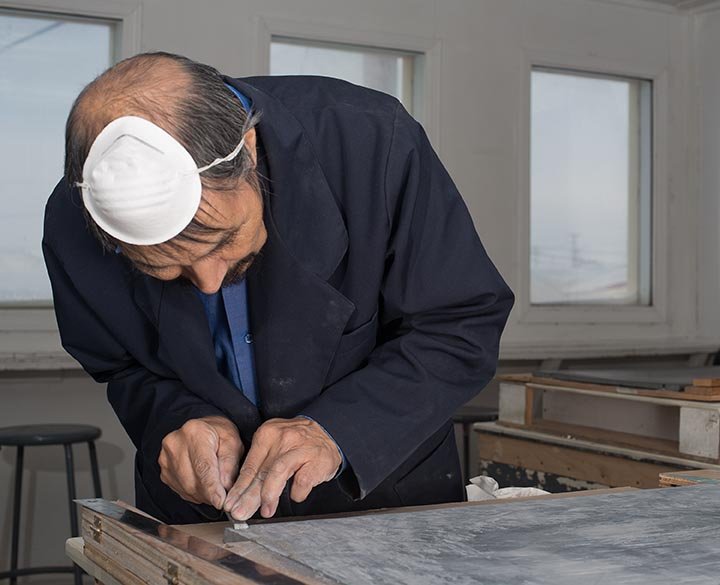
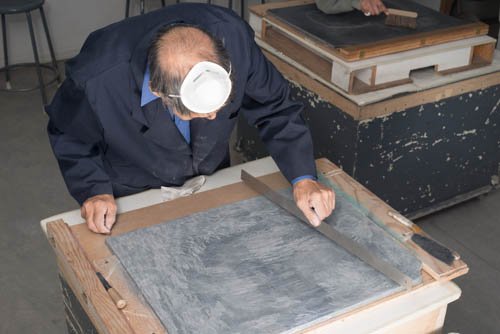
Qiatsuq was once a lithography printer so he understands the importance of keeping his options open. Here he uses a steel rule to check the level on the surface of the stone block before he stops using the chisel and turns to graining the stone prior to laying out his next project.

Tutuiza Jaw graining the slate for Qiatsuq Niviaqsie. He needs to learn how and no better way than from the master.
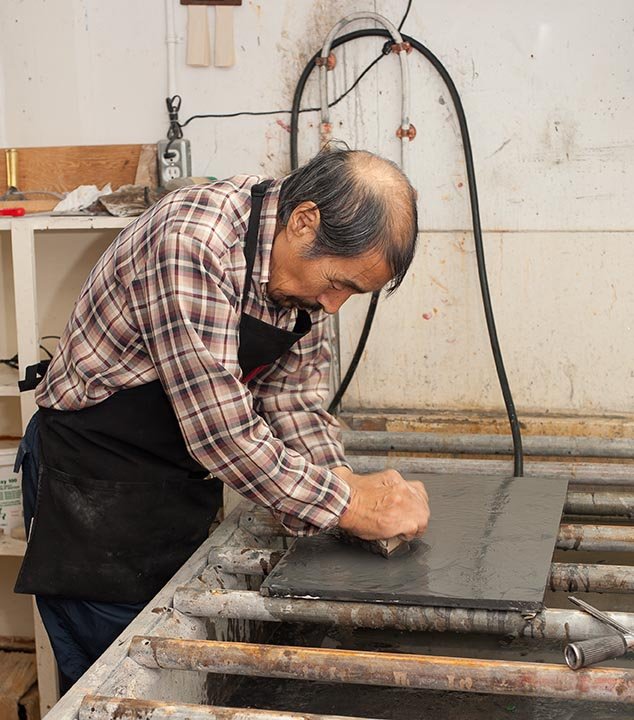
Sanding to remove the small scratches.
Finally, the processed stone is hauled back across the street to the stone cut studio. There, it receives several thin coats of white latex house paint. Sanding between coats removes any brush marks.
In the new Kenojuak Cultural Center and Printshop all of the printing disciplines are under one roof so these photos are all historical, the processes are the same.
Applying the Image
Next, the original image is traced in reverse using a light table and transferred to the stone with red oxide paper (the printer’s equivalent of carbon paper). The resulting red line guides the printer as he cuts the stone. To prevent smudging, the printer may draw over the red oxide transfer with a fiber-tipped ink pen. This is often the case with particularly detailed, complicated images.
Using a wide-blade chisel, an inch or so of the non-image area immediately adjacent to the image is removed to a depth of between 1/16th to 1/8th of an inch. This helps ensure this area doesn’t receive any ink by mistake. During this stage, the printer will normally cut to within 1/16th of an inch from the edge of the image, returning later with a finer tool to cut up to the image outline..

Qavavau Manumee begins to cut the design into the slate block.
Decision Point
At this point, the printer must decide which technique he will use to create the final print. This decision depends on the nature of the image to be rendered. If it consists of distinct, isolated elements, a skilled printer can use a non-reductive method which involves the use of multiple rollers at once, each inked with their own colour. All of the colours are applied to the stone and then printed at the same time. It sounds simple, but the skill and patience required to execute a multi-colour stone cut in a non-reductive method is staggering. It’s not uncommon for Kinngait’s printers to have five or more rollers all in use at the same time, each with its own colour and some with split rolls on a 1” wide brayer. Hand stenciling is often added to fill in colours that could not be applied with a roller. On some large prints, the printer will be able to print just three impressions a day!
If the image has delicate passages that are close together, or complex patterns, it will be executed as a reductive print. First, the lightest colour is applied over the entire image and printed... unless there’s an opportunity to print a second and sometimes third colour at the same time, using the non-reductive technique described above. Efficiency is the mark of a master printer and ideally, the paper should be printed asfew times as possible while still achieving the desired result.
Next, all areas that will remain the initial colour in the finished print are cut away. That’s right, cut away. Removed, destroyed ... toast. The remaining image surface is then inked and printed with the second lightest colour. This will produce a second and possibly third colour, as in some areas, the first and second colours blend to make a third. For example, if blue is printed over yellow, the two colours combined will create green. This process is repeated and the image is recut until all the colours have been printed, finishing with the darkest colour. With this method, the printer must be able to visualize the end product before he begins. Reductive is destructive. There’s no going back.

1st printed colours
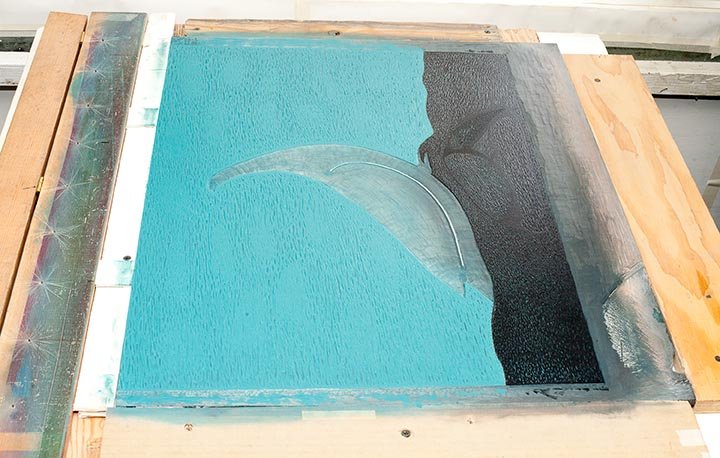
the image reduced and ready to be printed over the previous colours. Note the star shaped scratches on the wooden frame, they are the fine pins used to pierce the paper for registration.

Qiatsuq spoons the paper into the ink. His hand rests on the closed registration bar.

Qiatsuq slowly reveals the result of careful registration on a reduction print.
Registration, Registration, Registration
The colours must overlap perfectly, otherwise the final image will look fuzzy, blurred or “out of register”. To prevent this, the paper and the stone must remain perfectly oriented throughout the entire process. Take a look at the photos. Notice the stones are screwed onto the tables to keep them from moving. Look closer and you’ll see a hinged wooden strip along one side of the stone. This is the registration jig. Inside, a series of evenly spaced pins, positioned about one inch from the edge, runs the entire length of the strip. Each pin matches a corresponding hole on the other side, allowing the two halves of the jig to close tightly together.
When a printer prepares his paper, an additional one inch margin is left along one edge to accommodate the registration jig. Each sheet of paper is placed on the stone with the margin over the pins. The jig is then closed, pushing the pins through the paper creating a series of holes. When it’s time to print, the stone is inked, the holes in the paper are carefully aligned with the pins, and the jig is shut. The printer uses one hand to keep the jig locked and the other to ensure the paper lands evenly, without any wrinkles, onto the inked stone.
A light-weight, hand-held disk called a Japanese baren is rubbed over the back of the paper to ensure the ink has seated onto the surface of the paper. Next, a large soup spoon is used to burnish the paper into the ink until the printer can actually see an impression of the image on the reverse side of the paper.

Burnishing complete, the printer lifts the paper from its free edge, peels it towards the jig and lays it face up for inspection. The stone is then cleaned, dried and the process begins again with the next sheet.
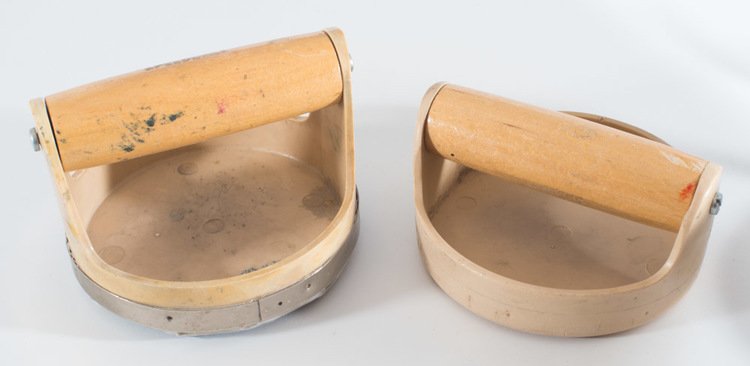
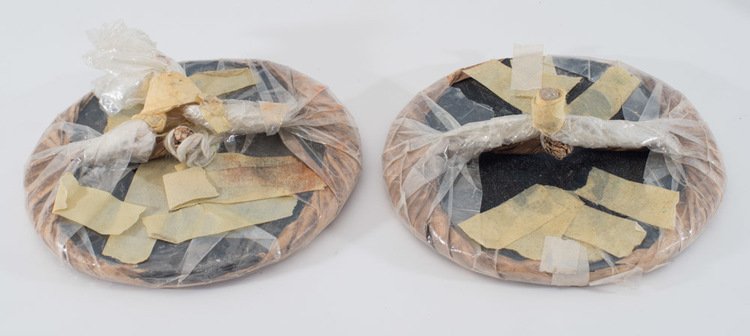
Qiatsuq was using one of this style of baren in the above photo. Hard to see through all that wax paper.
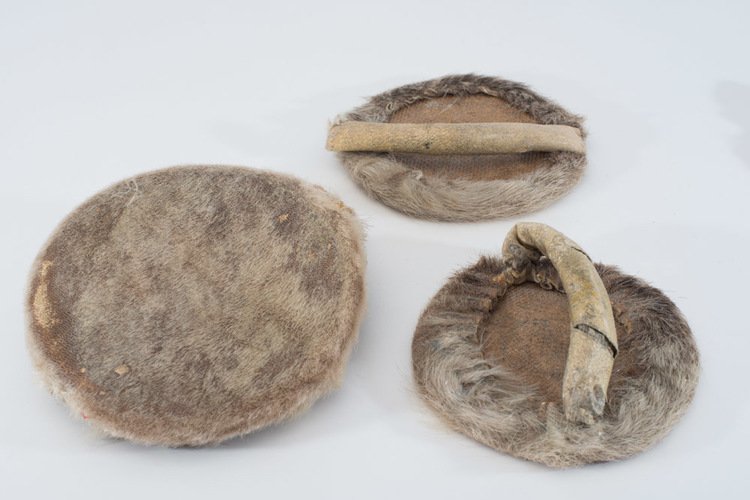
Early experiments to replace the worn out surface of the baren, barengawa (bamboo sheath) covering their baren with seal skin.

Handmade baren from the good old days.
An attempt to prolong the original barengawa (bamboo sheath) covering their baren.
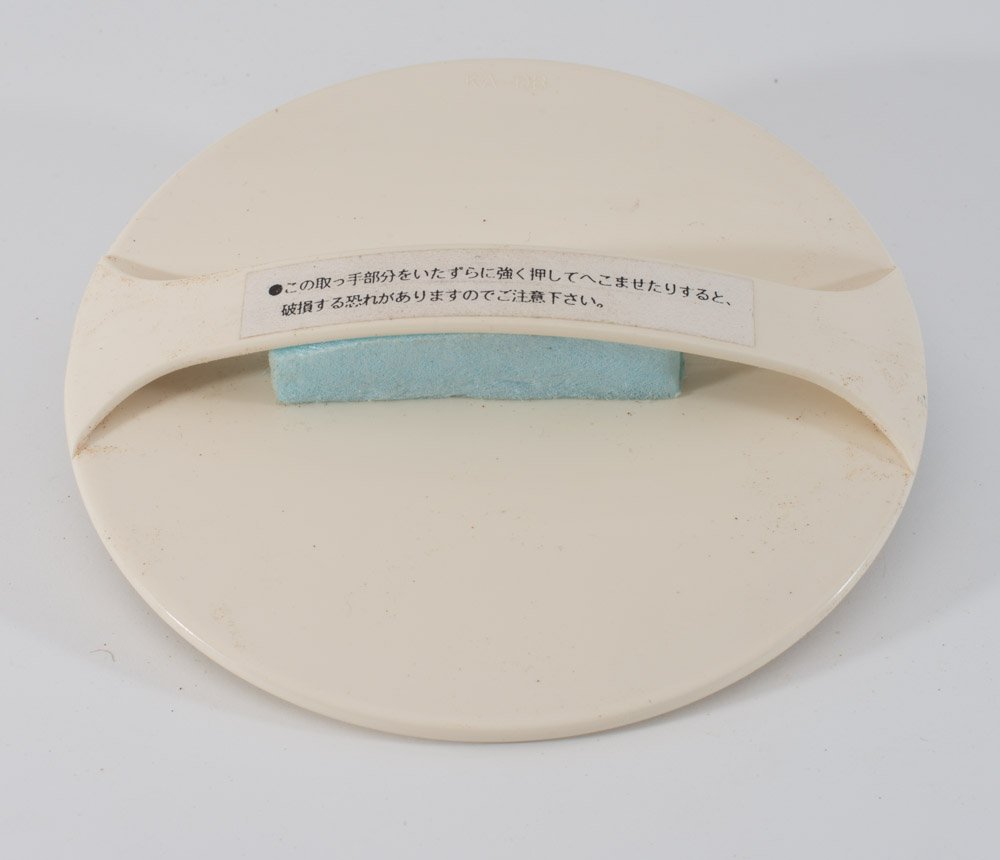
A beautiful baren designed not have to use the traditional cover. Apparently the blue foam was installed so the handle can be pinched easier. http://www.imcclains.com/catalog/baren/disk.html
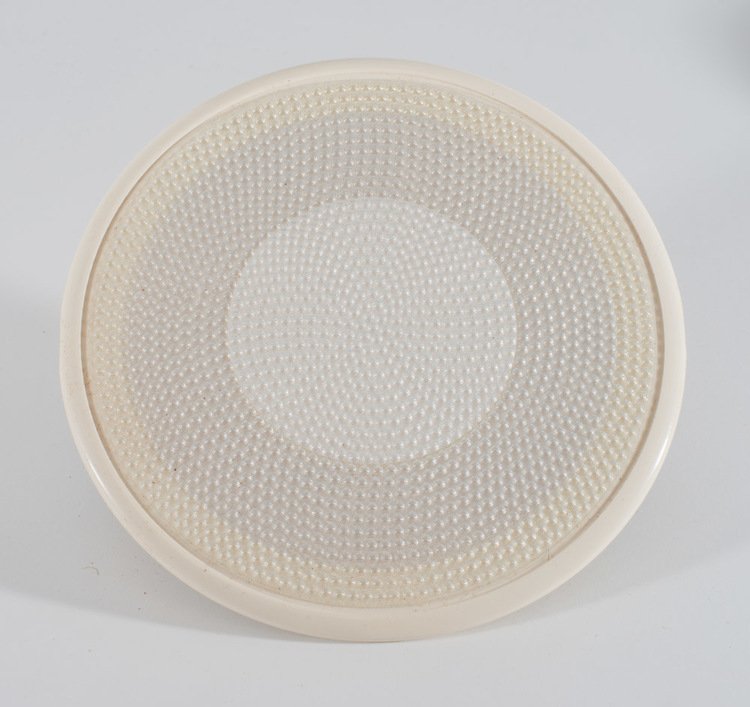
Obviously not used very much, this is the replaceable bottom of the above baren.
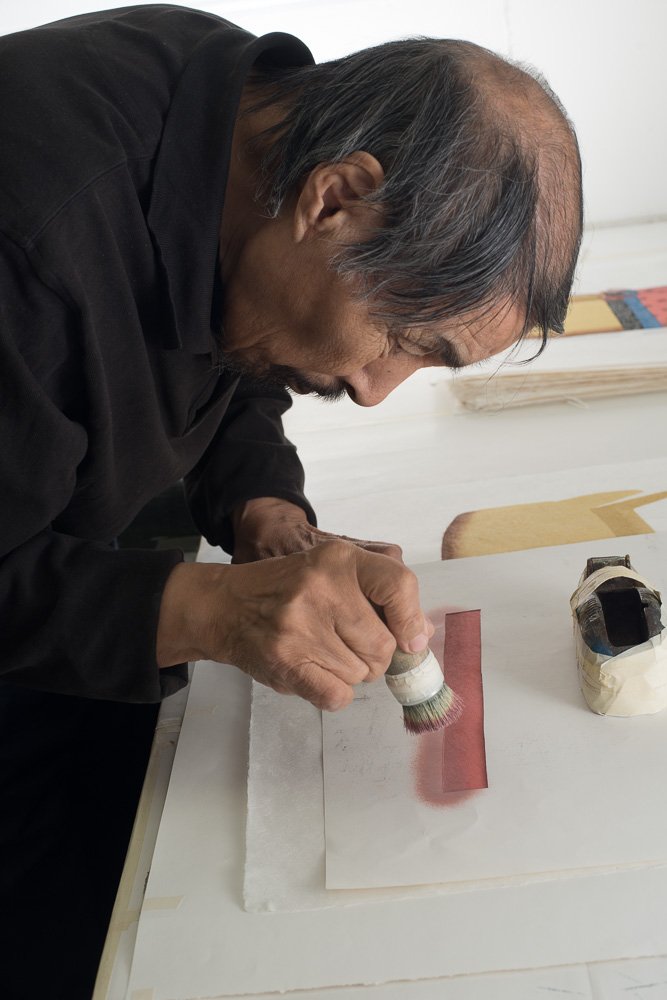
Qiatsuq stencils an element of the print using a simple paper stencil and a heavy weight to keep it from moving around.
I realize that this chapter is about stone cut printing but here in the the studios stenciling often becomes an accepted aspect of the printing process, planned for from the beginning to resolve the printed image. We use brushes associated with stencil printing used in industry for labeling things like crates back in the day.
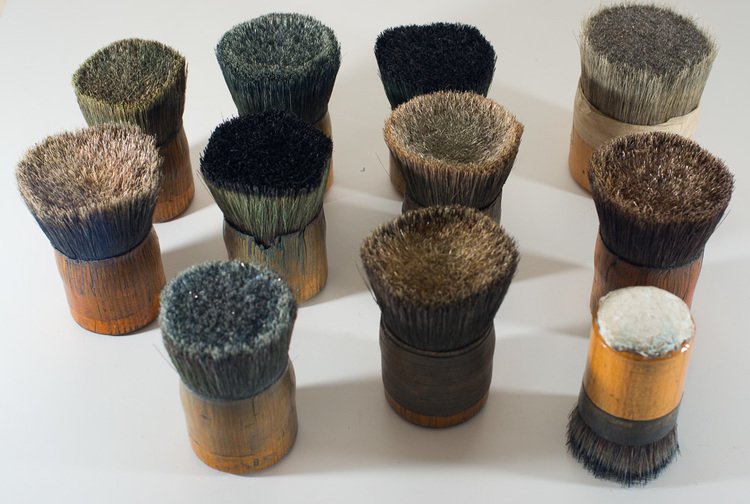
An assortment of old stencil brushes. It appears like horse hair inserted into bamboo sections with a wooden end cap to top it off. Often the printers will customize tools to suit themselves and here you can see insulation attached to the handle with double sided tape to give the printer some relieffrom the repetitive impact on their palms.
The problem with these stencil brushes is that they require careful cleaning or the ink sets up amongst the hairs and the brushes lose their suppleness over time. Often the brushes are left in a solution of solvent over time with the hopes to soak out the dried ink and what happens is that the solvent wicks up into the handles causing the bamboo to fail and the bristles to fall out. We are always on the look out for replacement brushes so let us know if you ever find a source.